Hi there!!! Hope everyone is doing fantastic and hanging in there! It’s been awhile since my last blog. It’s hard to come up with material when you’re daily activities for the past I don’t EVEN know long, have consisted mostly of being at home, walking, and driving around. I’ve mentioned in some other recent blog that because we’re all trying to stock up on groceries in hopes of not returning within at least a week, we’re grabbing easy stuff that doesn’t have a lot of ingredients. We’re also purchasing items that can be used in multiple dinners/lunches. I don’t know about you, but every trip requires a couple frozen pizzas…cause they’re tasty, easy, cheap, and in a pinch – they’re perfect. SO, there hasn’t been some cool recipe that I’ve been able to share. Dinners around here have all been yummy, but super simple- nothing crazy or out of the ordinary. However, on Tuesday… we made SUSHI!
I love sushi. I didn’t always though. My taste for it came somewhere in my early to mid- twenties. I believe it was my sister Maggie who introduced me to Hen House premade sushi that you can take to go and have a incredible light lunch or snack. Then after that, I stepped up to the big leagues and actually went to sushi restaurants 😎 However, I will say, I do not like any raw sushi, HAS to be cooked- I know I’m probably one of the few that feels that way. I get it!
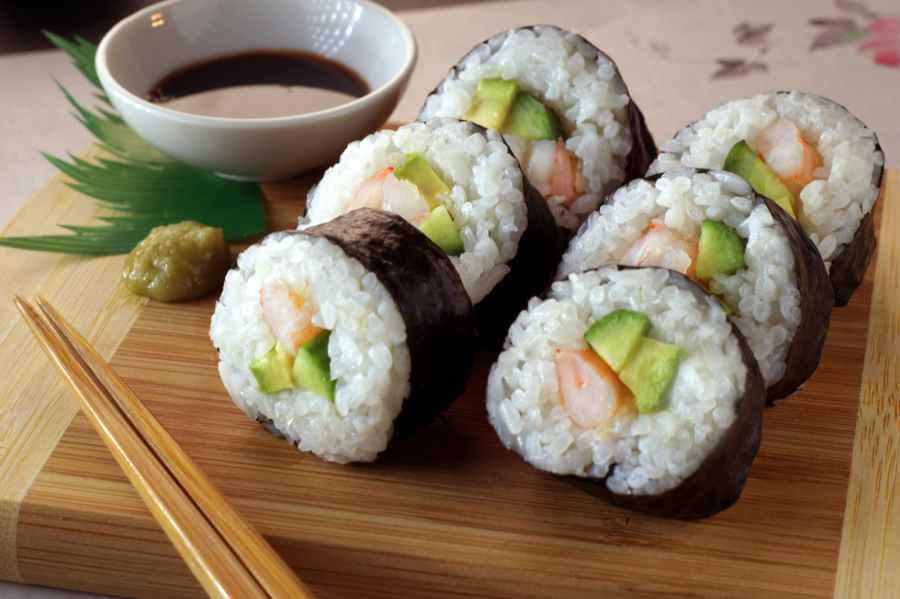
So for this particular recipe, you’ll need roasted seaweed wrappers, white rice or brown rice. (we used cauliflower rice. You can buy frozen, or just blend up a fresh cauliflower), avocado, cream cheese, and cucumber. In this recipe we don’t use any seafood, but you can add crab, shrimp, salmon- all would be awesome! This is just easy peasy.
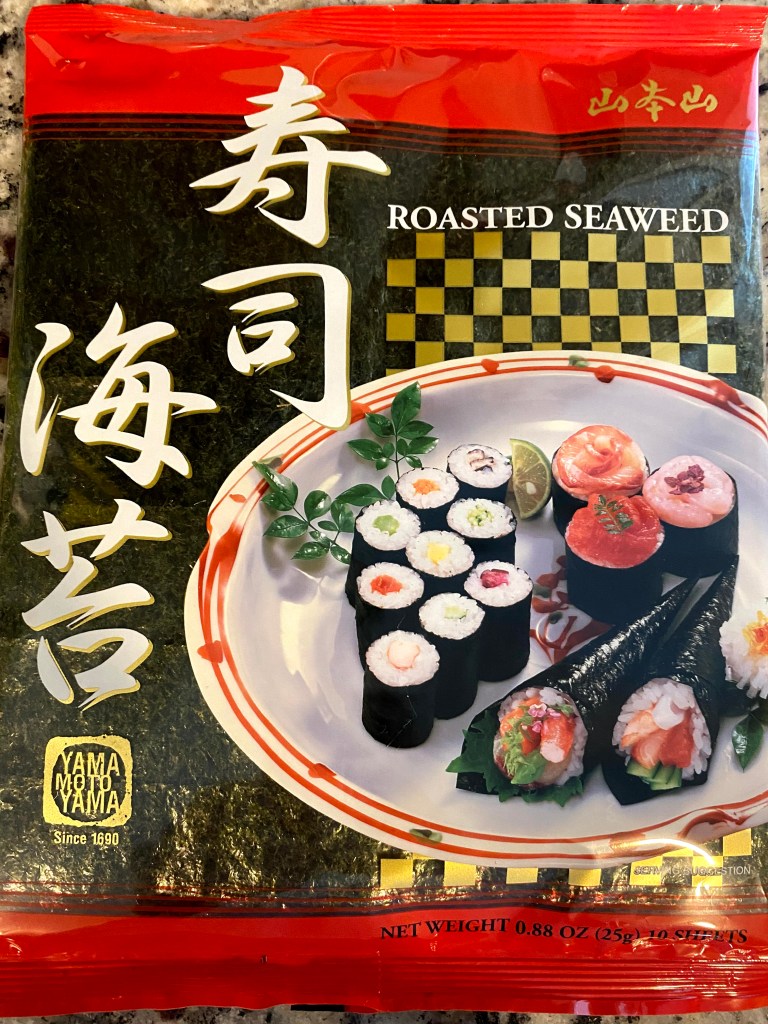
A couple side notes before we get started- You’ll need a bamboo mat to pack everything together. If you don’t know what I’m talking about, at the end of this blog, I’ll post a picture of the mat, and the seaweed package.) Another tidbit, you’ll want to make sure your cream cheese is packaged in a block, not in a container. One more thing- make sure it’s cold and not at room temperature.
On to the steps, Chefs!
1.) Let’s get started with the rice. If you’re using white rice, just follow the steps on the box. Once done place it in the refrigerator. You want it to be nice and cold. You could even put it in the freezer for 5-10 minutes and then transfer because the following steps don’t take that long. If you’re using bagged cauliflower, follow the instructions on the bag. Once done, let cool, and make sure it’s nice and dry. (sometimes when it’s frozen it can release a lot of water.) Finally – fresh cauliflower. Cut it up into smaller pieces and throw it into a blender. Blend until you achieve rice consistency.
2.) Get your knives out ladies and gents! First things first, peel your cucumber. The skin can be bitter, so it’s best to get rid of it. After that is done, slice the cucumber in half horizontally so it looks like two boats. With a spoon, scrape out the all the seeds. Once those steps are done you are ready to cut. Cut your “boats” both in half vertically so that you have four cucumber boats now. Next cut them into matchstick size pieces (When I say matchstick, I mean thin- because if I actually meant matchstick size, we would be in the kitchen for hours and hours.) Set your cucumber sticks aside on a plate or cutting board. Depending on how many people you’re making sushi for, that will determine how many cucumbers you will need. For the two of us, we used two medium cucumbers. We had quite a bit of sushi leftover that we both had for lunch the next day. Score!
2.) Cream cheese time. The reason why I said buy the block is because you will be cutting the cream cheese into strips. The reason you want it cold- It cuts MUCH easier and doesn’t fall apart. Cut as many strips as you think you have of the cucumber. You can really eyeball it. Now, if you don’t use ALL of the cucumber strips, or ALL of the cream cheese don’t throw it away! Save the cheese for a different day for maybe a bagel, OR dip the leftover cucumber sticks into it. Set your strips of cream cheese aside.
3.) Now it’s time for the avocado. It’s basically just the same thing we did with the cream cheese. Peel the outside part, remove the pit, and cut the avocados into strips. Don’t worry about some falling apart, you can still use it. I would recommend using two avocados if you’re cooking for two. Set aside!
4.) Almost done! It’s time to roll. Lay your bamboo mat on a flat surface like your kitchen counter or table. Lay a sheet of seaweed on top of it. Start spooning your rice on to that. You’ll want to cover all of it. Then you start organizing all your knife work masterpieces. Cucumber, cream cheese, avocado. Repeat until you get to the end. Now you’re going to start the rolling. You want to make tight rolls so that it all sticks together nicely. Take your time! Once you’re all done with making your rolls (you will end up with multiple rolls), this next step is optional but recommended. Put the rolls in the refrigerator for 20-30 minutes. To me – and this could totally be in my imagination, it makes the rolls easier to cut and makes every part of the roll just marry each other.
5.) Cut the rolls up how thick or thin you like your sushi. We usually do around an inch. Your call! Your sushi is done, now what? EAT!
This recipe might seem like a lot of work, but it really is easy steps. It’s something different, and once it’s all done… it’s really worth it! Below are the pictures of the bamboo mat and the seaweed package. Both items were found at local grocery stores, no where fancy.

That’s it, folks! Hope you like it if you try it, and have a good rest of your Thursday! Hope you’re staying healthy, safe, and home.
With love,
Abby
